-
-
What is included:
-
1- Z Brake Board
-
1- 200mm wire set with Molex SL connector, other end bare
-
1- Molex SL housing 1x4
-
1- Molex SL housing 1x2
-
8- Molex SL crimps
-
-
-
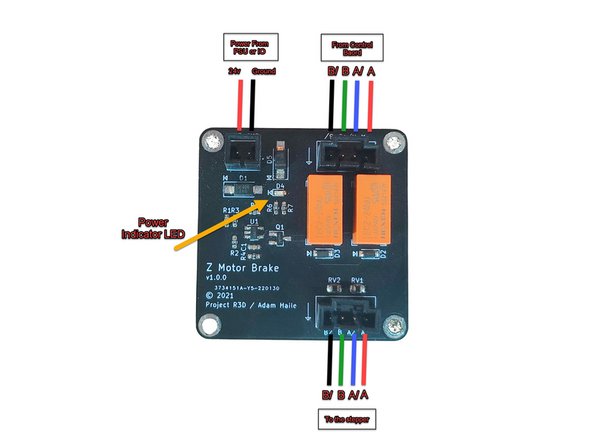
Power In- 24v, it is recommended to run it from IO on the board such as an unused fan port. This will allow you to limit the delay between the motor power off and the brake board activating.
-
If an IO port is not available, you can run it directly from your 24v power supply.
-
4-pin plug from the driver on the control board.
-
4-pin plug from the brake board to the stepper motor. The wire colors for your specific motor wires may be different and you will need to find your motor's specific pairs.
-
Power Indication LED- This will only be light when 24v is applied to the board.
-
-
-
Without power applied to the Brake board and the LED is lit your motor will not be driven.
-
Mount the board using M2 bolts.
-
Using a multimeter you can check that your relays are releasing, they will only open once 24v is applied to the power in.
-
More info can be found here: https://github.com/Project-R3D/Z-Brake-B...
-