-
-
Now that your filament is loaded we can start printing one of the preloaded files.
-
Go to the Jobs category on the left side of the Web Interface.
-
Select one of the three pre-loaded files, these files have been tuned for the material that was sent with your unit.
-
-
-
Once you select which file you would like to print, left-click on it and select print.
-
Your unit will now start heating,
-
Once the print is selected it will switch you over to the Status category where you can monitor your print and make adjustments where needed.
-
-
-
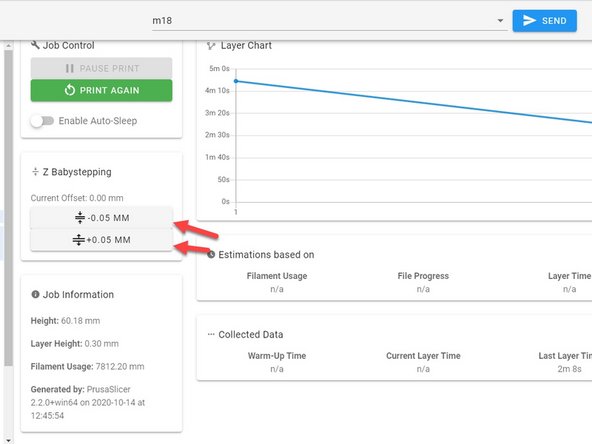
Once your print starts, if you see that the first layer isn't sticking down well enough or it is too close to the bed you can adjust it with the Baby Stepping option on the left hand side of the Status catagory
-
If your first layer is too close, select the arrows that are pointing away from each other until the first layer is correct.
-
If your first layer is too far away select the arrows that are pointing towards each other until you are getting good adhesion
-
These Baby Step adjustments will remain until the printer is turned off. If you find that you are always having to adjust the Baby Stepping after each restart by the same amount, you can make a permanent adjustment with the Z Offset. Instructions for that can be found in Troubleshooting
-
Cancel: I did not complete this guide.
2 other people completed this guide.


